MatLab
Data import MatLab
The measurement data recorded in the logger component of the DMP can be imported directly from the ORACLE database into MatLab worksheets/scripts. This eliminates the intermediate step of first exporting the data into CSV tables and then importing them again, which is a time-consuming process. In addition, if the data source in MatLab is updated, it is possible to always work with the most current measurement data available in the database.
Requirements
Technical requirements
- MatLab R2015b or MatLab R2014b on the (Windows) Client
- ORACLE Client on the (Windows) Client
- Access to the UFZ intranet
These requirements are currently met on the Windows terminal server msg,
which can be accessed via RDP client.
Administrative requirements
The necessary database views and login data are set up by the database administrator if necessary. The setup can be requested informally by email to wkdv-logger@ufz.de, stating the data project. The request sender should be a project member who is authorized as an administrator in the data project.
Step-by-step guide
1. Have an external database connection set up
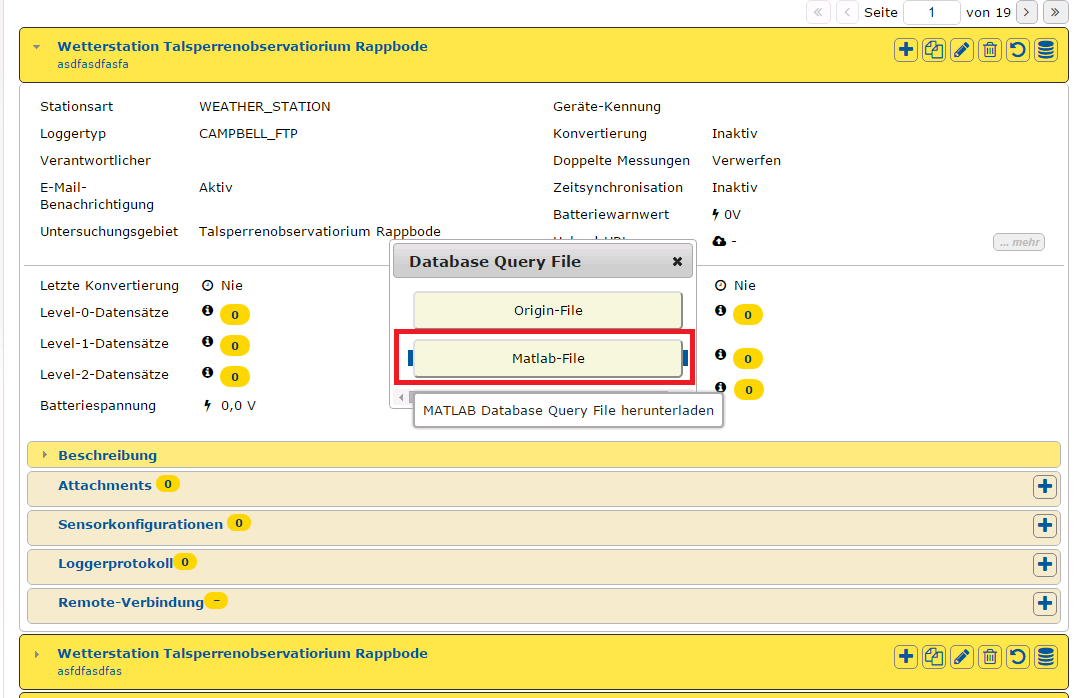
2. Download MatLab connection file from the logger component
To establish the connection from MatLab there is no manual configuration required.
The necessary connection parameters can be imported using a “MatLab file”.
The configuration file is dynamically generated in the logger component and can be
downloaded there as soon as the database connection is set up using the
Download Database Query File button in the logger overview.
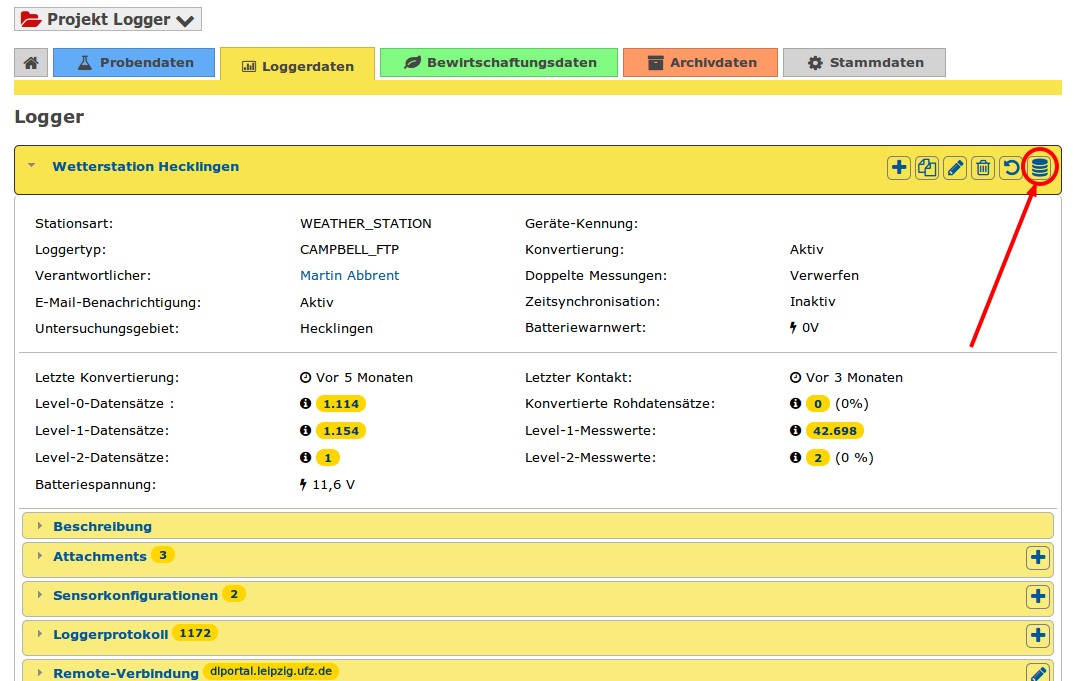
To download the connection file, the user must be assigned the right
May read level 1 data in the data project.
3. Specify path to Oracle driver
Static
You can do this both on your own client and on the msg server:
- Open MatLab.
- Run the command
prefdirin the Command Window. A folder path on your computer will be displayed. - Close MatLab.
- Navigate to the above folder and create a new file called javaclasspath.txt.
- Open javaclasspath.txt. Add the full path to the Database Driver JAR-file.
The complete path includes the path to the folder in which the JAR-file is
located and the name of the JAR-file. For example,
C:\DB_Drivers\ojdbc6.jar. Save and close javaclasspath.txt. - Start MatLab again.
Dynamic
The path can also be dynamically integrated directly into MatLab. However, this has to be done again every time MatLab is restarted, which is not the case with the static method:
- Open MatLab
- Run the command
javaaddpathin the Command Window. Pass the full path to the Database Driver JAR-file. The complete path includes the path to the folder in which the JAR-file is located and the name of the JAR-file. For examplejavaaddpath('C:\DB_Drivers\ojdbc6.jar').
Now you can use the connection file.
4. Open connection file in MatLab
In order to use the connection to the database in MatLab, the downloaded file
must be executed in your MatLab script. To do this, use the command run.
There are 2 variants:
You move the downloaded file to the same folder where the current script is located
and execute the run command
run('file_name.m');
Instead of moving the downloaded file, you can also specify the entire file path.
The complete path includes the path to the folder in which the downloaded file is
located and the name of the file. You can then execute the run command again
run('path\to\file\file_name.m');
5. Load preview
Use the following commands to load the first 50 records for control purposes.
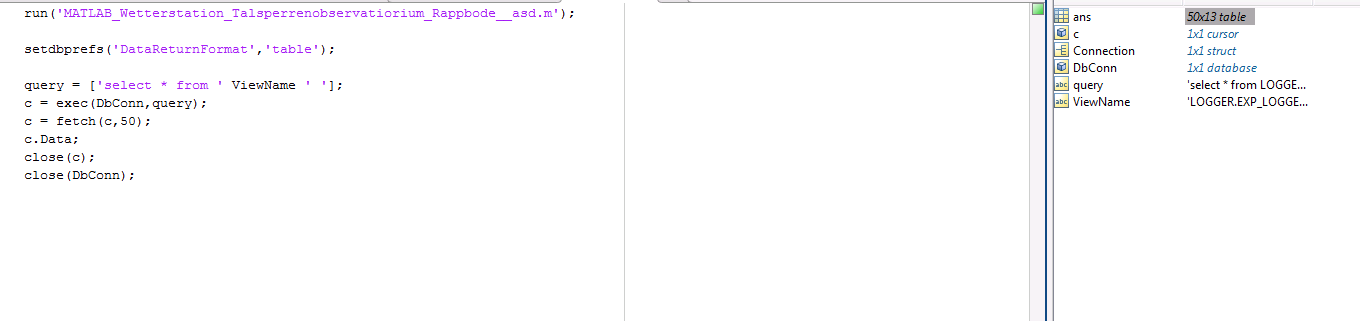
run('MATLAB_Wetterstation_Talsperrenobservatiorium_Rappbode__as.m');

setdbprefs('DataReturnFormat','table');

query = ['select * from ' ViewName ' '];

c = exec(DbConn,query);

c = fetch(c,50);

c.Data;

close(c);

close(DbConn);
6. Load data
Loading all the data at once is not recommended as this takes a long time and may lead to errors.
If it is still necessary, the following method is recommended:

run('MATLAB_Wetterstation_Talsperrenobservatiorium_Rappbode__as.m');

setdbprefs('DataReturnFormat','table');

setdbprefs('FetchInBatches','yes');

setdbprefs('FetchBatchSize','10000');

query = ['select * from ' ViewName];

c = exec(DbConn,query);

c = fetch(c);

c.Data;

close(c);

close(DbConn);
The important thing here is to set:
setdbprefs('FetchInBatches', 'yes')

setdbprefs('FetchBatchSize', '10000')
This process can take some time depending on the amount of data and the load on the database system.
7. SQL - short explanation
This point explains the basic handling of the database connection. The database connection script you downloaded provides you with 2 variables:
- DbConn - Database connection object
- ViewName - Name of the logger from which the data is obtained
After the run command, the following command must always follow:
setdbprefs('DataReturnFormat','table') - sets the output format to table
and for larger amounts of data also the following:
setdbprefs('FetchInBatches', 'yes')

setdbprefs('FetchBatchSize', '10000')
The request is then made to the database.
Constraints
All possible constraint parameters can be found under Constraint Parameters.
Constraint of time
This constraint can only be applied to TIMESTAMP_MEASUREMENT, TIMESTAMP_CAPTURED and TIMESTAMP_CONVERTED.
Example: From a certain point in time

setdbprefs('DataReturnFormat','table');

setdbprefs('FetchInBatches','yes');

setdbprefs('FetchBatchSize','10000');

query = ['select * from ' ViewName ' where TIMESTAMP_MEASUREMENT > to_date(''01.01.2016'',''dd.mm.yyyy'')'];
c = exec(DbConn,query);

c = fetch(c);

c.Data;

close(c);

close(DbConn);
Example: Time interval

setdbprefs('DataReturnFormat','table');

setdbprefs('FetchInBatches','yes');

setdbprefs('FetchBatchSize','10000');

query = ['select * from ' ViewName ' where TIMESTAMP_MEASUREMENT > to_date(''01.01.2016'',''dd.mm.yyyy'') '...
'and TIMESTAMP_MEASUREMENT < to_date(''11.01.2016'',''dd.mm.yyyy'')'];
c = exec(DbConn,query);

c = fetch(c);

c.Data;

close(c);

close(DbConn);
Constraints by name
This always applies to words and characters. It is important that the property to be checked is always enclosed in single quotation marks.

setdbprefs('DataReturnFormat','table');

setdbprefs('FetchInBatches','yes');

setdbprefs('FetchBatchSize','10000');

query = ['select * from ' ViewName ' where PHYSICAL_PROPERTY_NAME = ''LOGGER_VOLTAGE'''];
c = exec(DbConn,query);

c = fetch(c);

c.Data;

close(c);

close(DbConn);
Constraint by numbers (no date)
When constrained by certain numbers, they always appear without quotation marks.

setdbprefs('DataReturnFormat','table');

setdbprefs('FetchInBatches','yes');

setdbprefs('FetchBatchSize','10000');

query = ['select * from ' ViewName ' where LIMIT_EXCEEDED = 0'];

c = exec(DbConn,query);

c = fetch(c);

c.Data;

close(c);

close(DbConn);
8. PhysicalProperties and Sensors
Two new lists have been added to the Matlab script: PhysicalProperties and Sensors.
PhysicalProperties
The PhysicalProperties list contains all PhysicalProperties belonging to the logger. The following properties can be accessed:
PHYSICAL_PROPERTY_NAME, LABEL_DE, LABEL_EN, SAMPLING_MEDIA_NAME, SHORT_FORM_DE,
SHORT_FORM_EN, DEPRECATED, INSTRUMENT, DESCRIPTION_DE, DESCRIPTION_EN,
DEFAULT_LIMIT_MIN, DEFAULT_LIMIT_MAX
Example:
PhysicalProperties{1}.PHYSICAL_PROPERTY_NAME; // returns the PHYSICAL_PROPERTY_NAME of the first PhysicalProperty
Sensors
The Sensors list contains all sensors belonging to the logger. The following properties can be accessed:
SENSOR_ID, NAME, LABEL, DESCRIPTION, EVALUATE_SENSOR, COMPARTMENT_NAME,
SAMPLING_MEDIA_NAME, PHYSICAL_PROPERTY_NAME, UNIT_NAME, SAMPLING_ALTITUDE,
KIND_OF_OBSERVATION, SAMPLING_INTERVAL, ADDITIONAL_NUMBER, ADDITIONAL_LABEL,
ORT_ID, SENSOR_CONFIGURATION_ID, VIRTUAL_SENSOR, POSITION, DELETED, UPDATED,
MEASUREMENT_FUNCTION_ACTIVE, MEASUREMENT_FUNCTION_DESC, MEASUREMENT_FUNCTION_LABEL,
MEASUREMENT_FUNCTION, LIMIT_ACTIVE, LIMIT_MINIMUM, LIMIT_MAXIMUM
Example:
Sensor{1}.NAME; // returns the NAME of the first sensor