Procedure for archiving files
1) Registration in the web application area
Register under https://www.intranet.ufz.de/admin in the UFZ web application area.
2) Access the data management portal
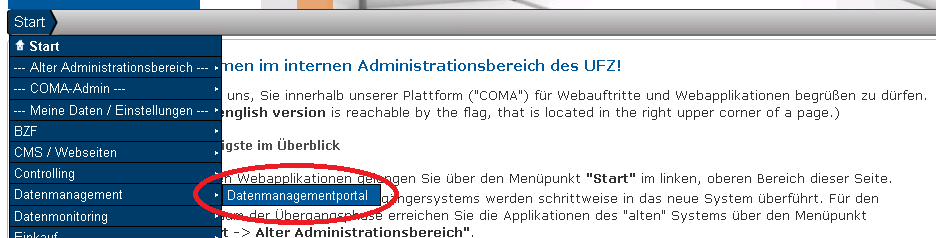
In the menu, select the item Data management > Data management portal.
3) Create a new archiving order
Click there under the tab Archive data on Create new archiving order.
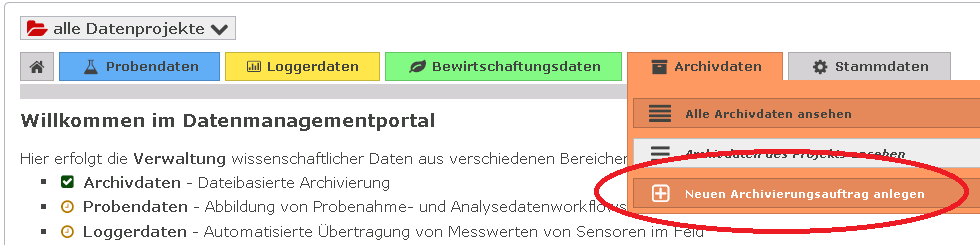
Attention: If the button is deactivated, please find help in our FAQ.
4) Completing the formular
The following information is essentially required:
-
Allocate the data to a data project (also see "What are data projects?")

-
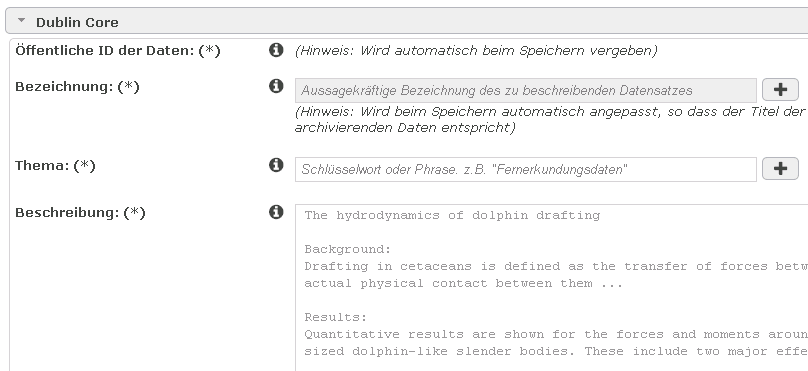
Designate the data with a meaningful title.

-
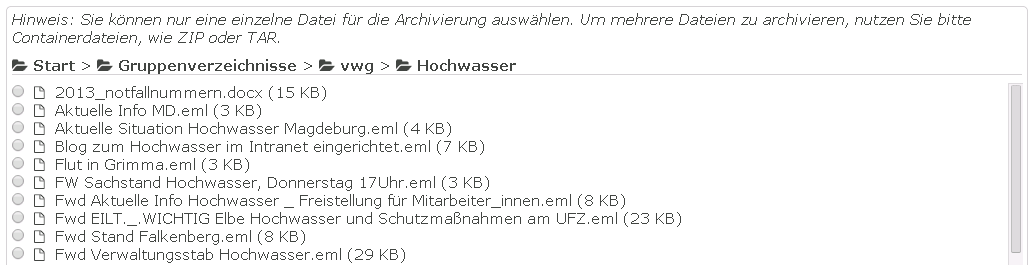
Select the file to be archived.
Note
Just one file only can be archived. If you want to archive several files or directories, please combine them in a single ZIP or TAR file. The selected file is first only earmarked for archiving; i. e. is not yet any archiving or transfer of the server so that you should not yet delete the file!
-
Describe the data on the basis of the DublinCore metadata catalogue.
Note
The describtion of the data is important in order to be able to find and allocate them later again.
-
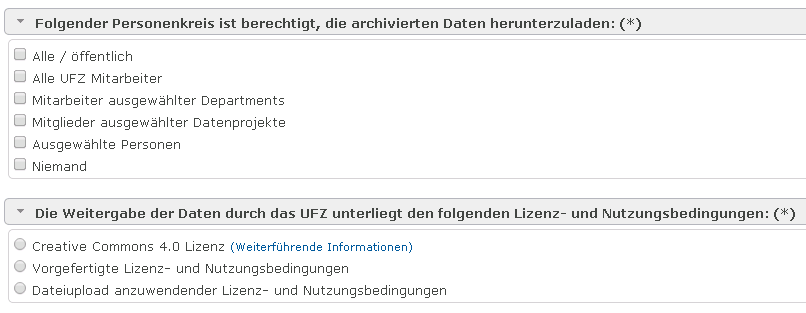
Select the group of persons who are authorised, after successful archiving, to download the data again and define which terms of licensing and use the download of data is subject to.
-
Confirm finally that the provision of the data to the selected group of persons does not breach the data's terms of licensing and use.

5) Set up archiving order
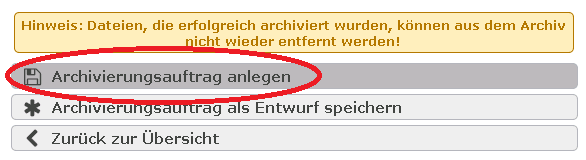
Click on the button Set up archiving order to store the data and provide them for archiving.
6) Processing subsequently
- Within the following 60 minutes, you will have the opportunity of adjusting the archiving order just set up. After an adjustment, the 60 minute remaining processing period begins again.
- As soon as the 60 minutes expired, the archiving order is provided for processing and as of this point in time no longer alterable.
-
Several submitted archiving orders (all users) are processed one after the other. As soon as it is the turn of your archiving order, the following happens:
- The selected file is copied by the source system (e.g. group drive) into the archives system.
- From the archives system, the file will be copied to two locally separated long-term storage media (tape drives).
- Subsequently, data integrity is validated on the basis of checksums so that it can be ensured that the archived data correspond with the source data.
- Following successful or failed archiving, you will be automatically advised thereof via email.
-
Only after the archiving process was successfully concluded, you should delete the file in the source system.
- Moreover, after successfully completed archiving, you will have the option of adjusting the metadata, the persons entitled to download as well as the terms of licensing and use.
7) Register a DOI (optional)
You can optionally register a Digital Object Identifier (DOI) for your archived data. Find more information here